
Mastering the Task: How to Hardwire a Doorbell without Professional Help
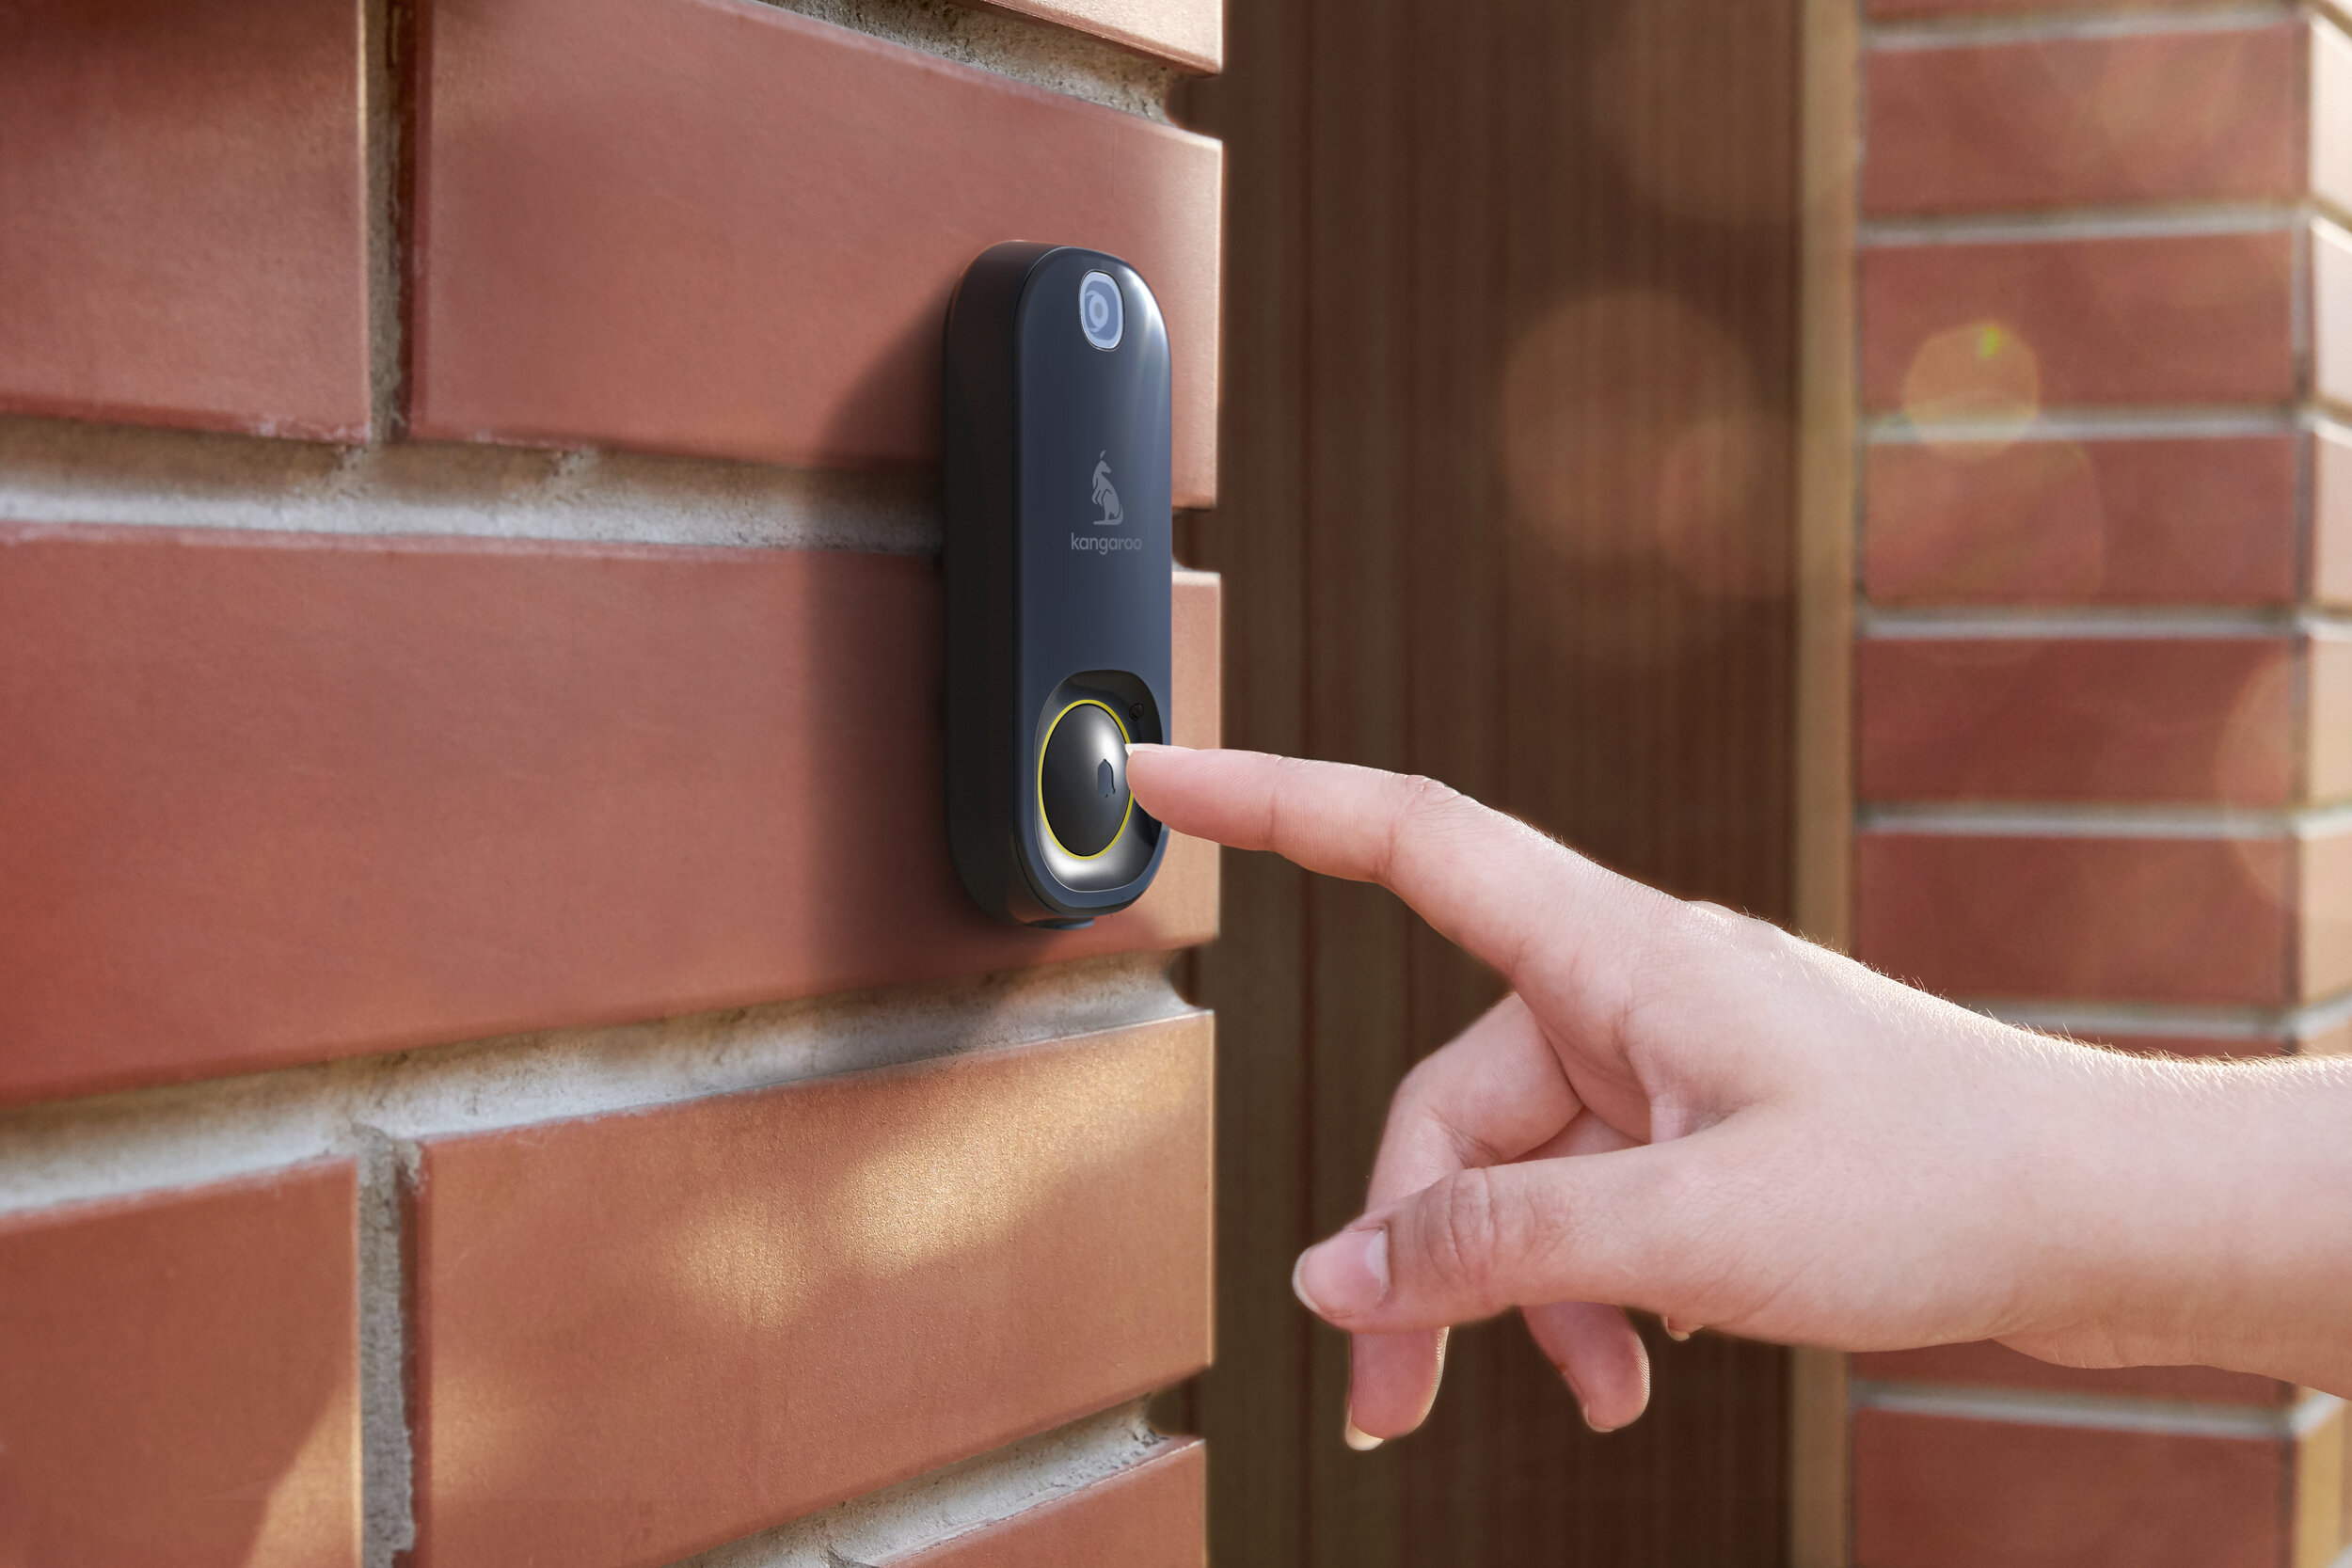
A doorbell serves as your home's first line of defense and a friendly welcome chime. Installing a wired or hardwired doorbell yourself can be an empowering and cost-saving project, adding a sense of accomplishment alongside enhanced security. Whether you're opting for a classic chime or a modern video doorbell like the Kangaroo Video Doorbell, this guide equips you with the knowledge and confidence to tackle the task.
Disclaimer: This guide is for informational purposes only. Always prioritize safety and consult a qualified electrician if you're unsure about any step or uncomfortable working with electrical wiring.

Why Go Wired, Hardwired or Wireless?
Compared to wireless doorbells, wired and hardwired options offer several advantages

Wired and Hardwired Doorbells: Dependable and Traditional
Pros:
Rock-solid reliability: No need to worry about dead batteries interrupting your security. Always ready with continuous power.
Stronger signal: Enjoy unwavering communication between doorbell and chime, even with thick walls or long distances.
Weatherproof warriors: Built to withstand harsh elements, ensuring consistent performance year-round.
Cost-effective in the long run: Eliminate recurring battery costs, leading to potential savings over time.
Smart potential: Many integrate with smart home systems, offering video streaming, two-way talk, and motion detection.
Wide range of customization: Choose from various chimes, buttons, and transformers for a personalized touch.
Cons:
Installation can be more complex: Requires running wires, potentially involving drilling and electrical work.
Less flexible placement: Limited to areas with existing wiring, restricting location options.
Higher initial cost: Installation might require professional assistance, increasing initial investment.
Wireless Doorbells: Convenience on the Go
Pros:
Easy installation: No wiring required, making it a DIY-friendly option.
Flexible placement: Mount anywhere with Wi-Fi coverage, offering more installation freedom.
Mobile access: Monitor your doorbell from anywhere with a smartphone app.
Quick and budget-friendly: Easy setup means lower initial costs.
Cons:
Battery dependence: Prone to interruptions if batteries run low, requiring regular replacements.
Potential signal issues: Wireless networks can be susceptible to interference or distance limitations.
Limited smart features: Some wireless models offer fewer smart integrations compared to wired counterparts.
Security concerns: Wireless networks pose potential security risks if not properly secured.
Ultimately, the choice between wired, hardwired, or wireless options boils down to your priorities and needs. If you prioritize uninterrupted reliability, consistent performance, and the potential for cost savings, then opting for a wired or hardwired solution is a wise investment. With the added benefit of potential smart features and personalization options, you can create a doorbell system that perfectly complements your security and convenience needs.

Safety First!
Before diving in, remember: electrical work demands caution. Turn off the power at the breaker box before starting and consult a qualified electrician if you're unsure about any step.
Before You Begin:
Assess your comfort level: While detailed instructions are provided, hardwiring involves electrical work. If you're unfamiliar with electrical systems, consider seeking professional help to ensure safety and proper installation.
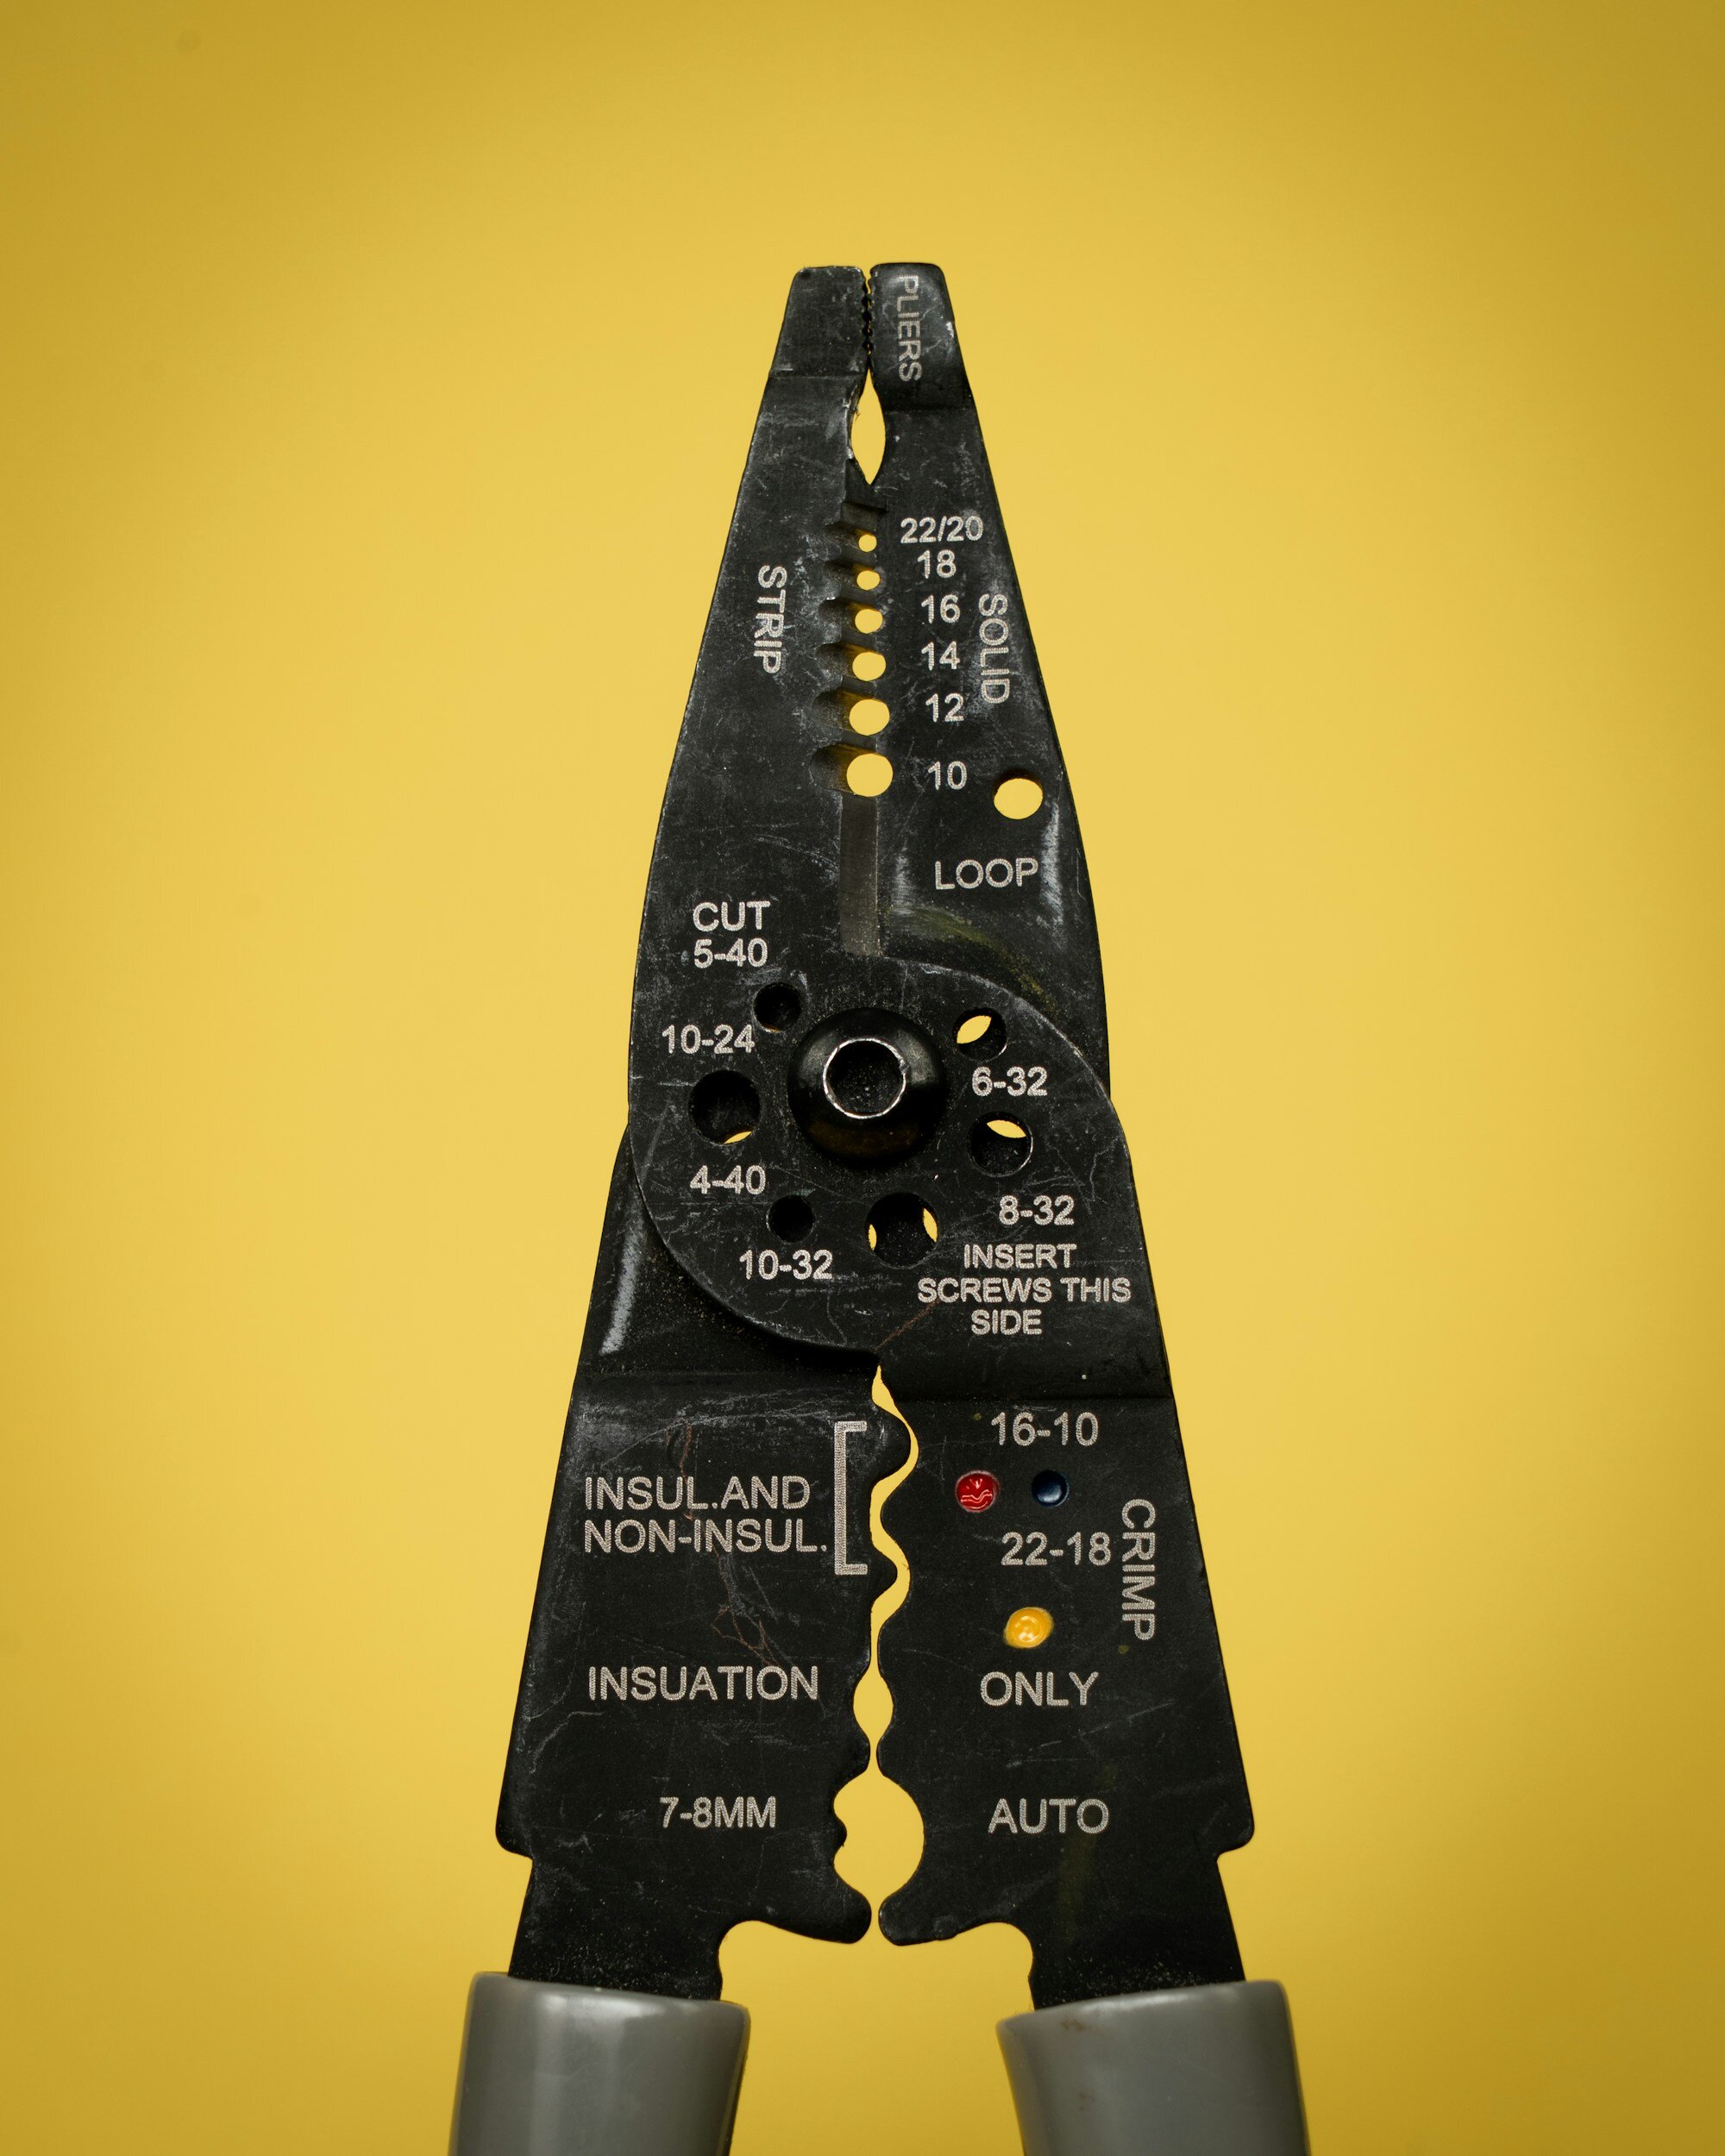
Gather your tools and materials: Screwdrivers (flathead & Phillips), wire strippers/cutters, pliers, electrical tape, level, drill (optional), anchors & screws (optional), doorbell transformer (check voltage requirements), doorbell chime unit, doorbell button, wires (appropriate gauge for your system), instructions for your specific doorbell model.
Turn off the power at the breaker box: Safety first! This ensures you won't be working with live wires.
Identify existing wiring: If you have an existing doorbell, locate the wires for the transformer, chime, and button. Note their colors and connections.
Tools & Materials:
Screwdrivers (flathead & Phillips)
Wire strippers/cutters
Pliers
Electrical tape
Level
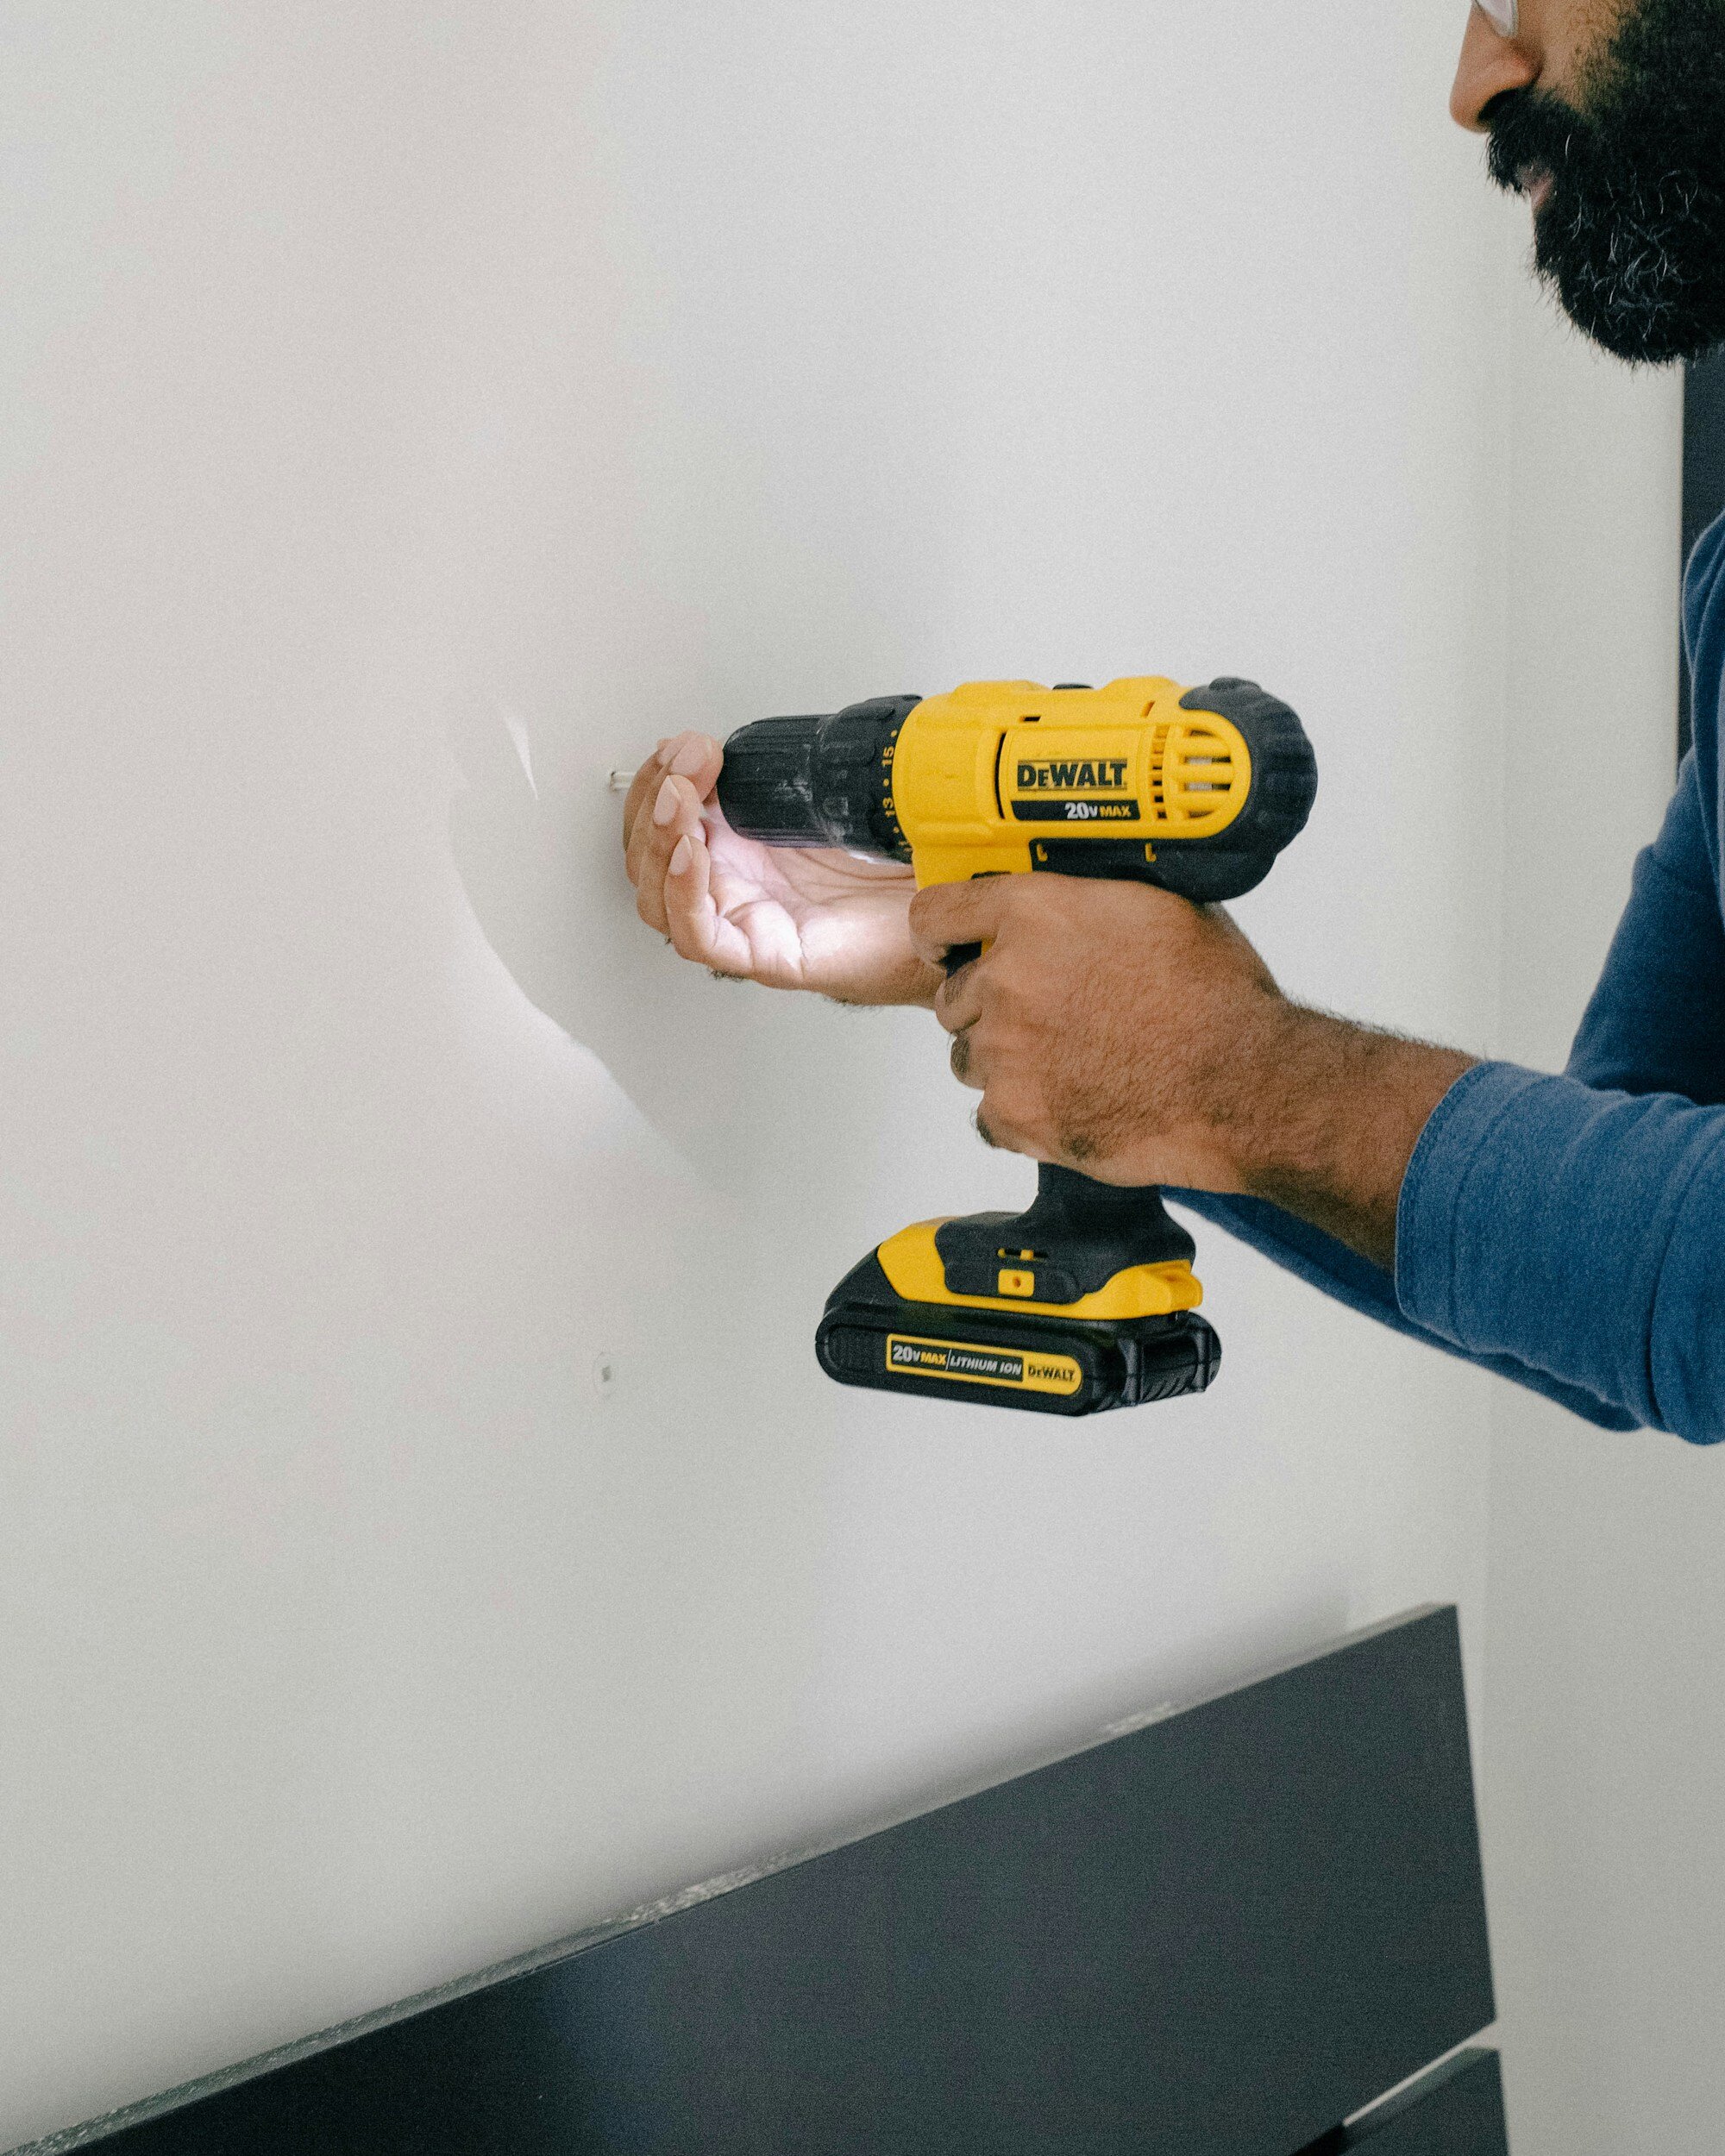
Drill (optional)
Anchors & screws (optional)
Doorbell transformer (check voltage requirements)
Doorbell chime unit
Doorbell button
Wires (appropriate gauge for your system)
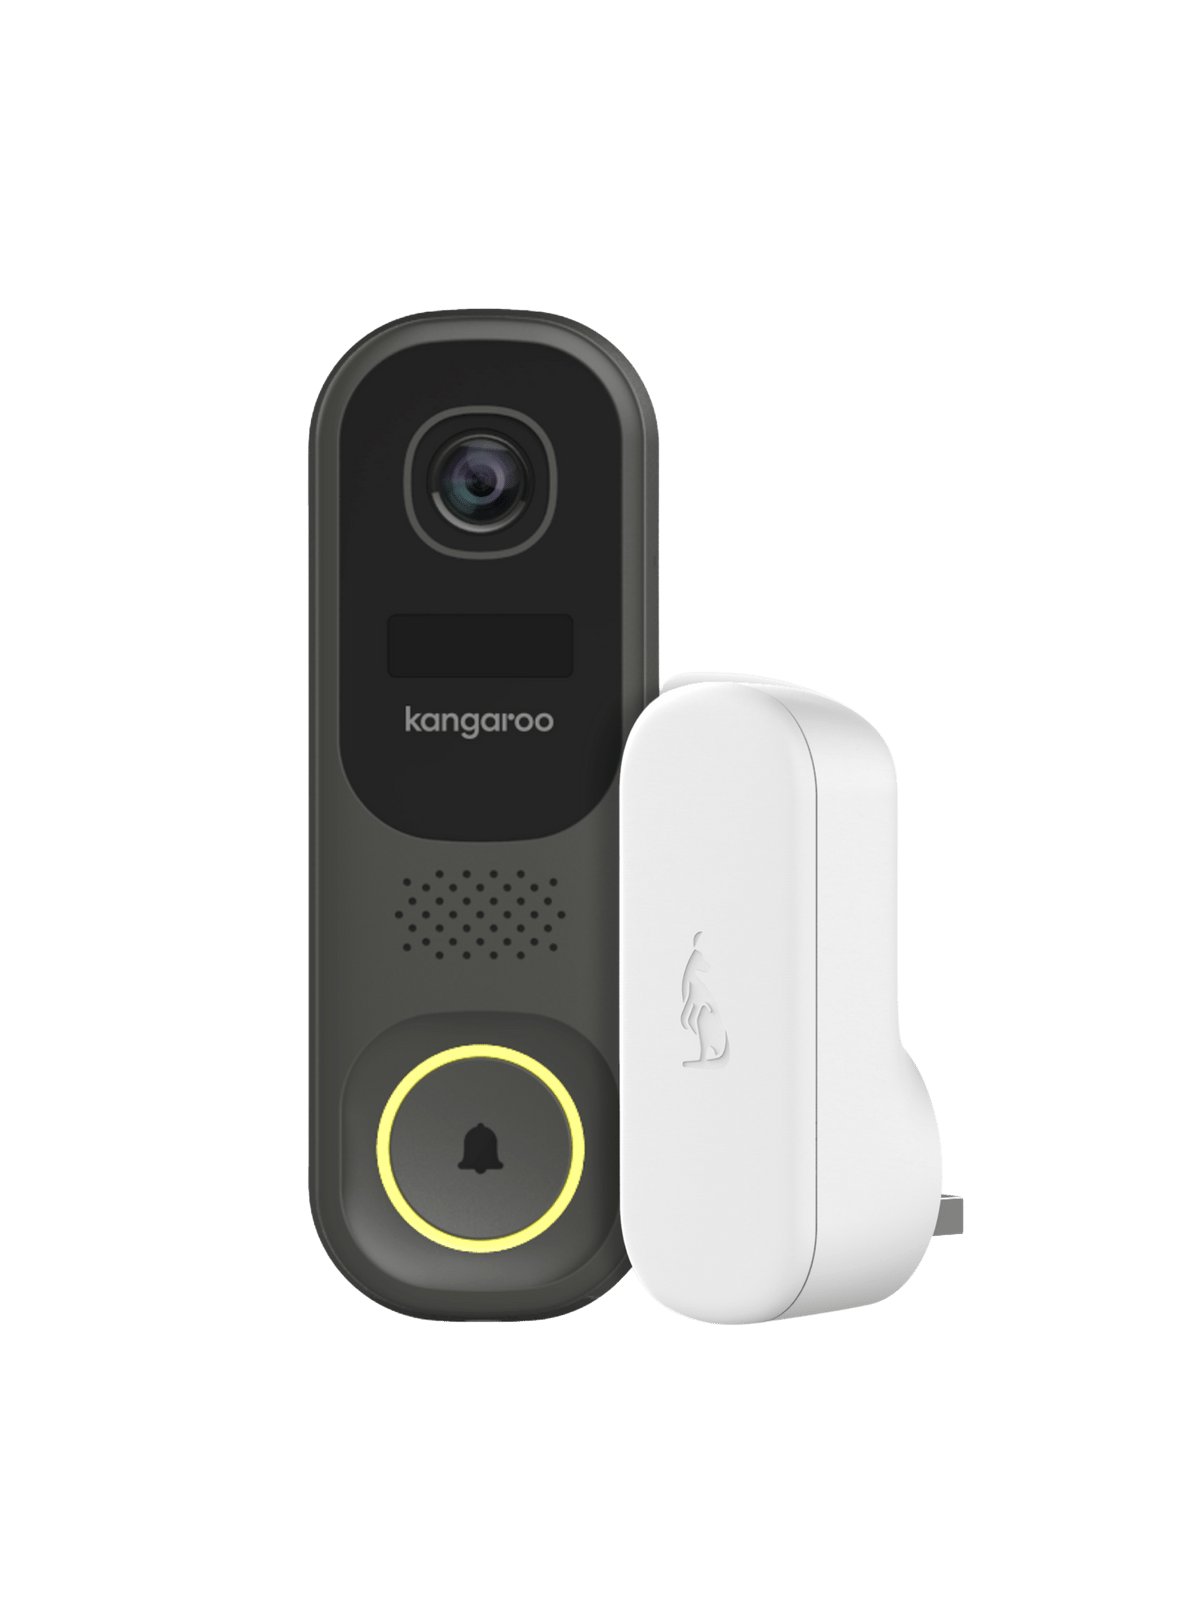
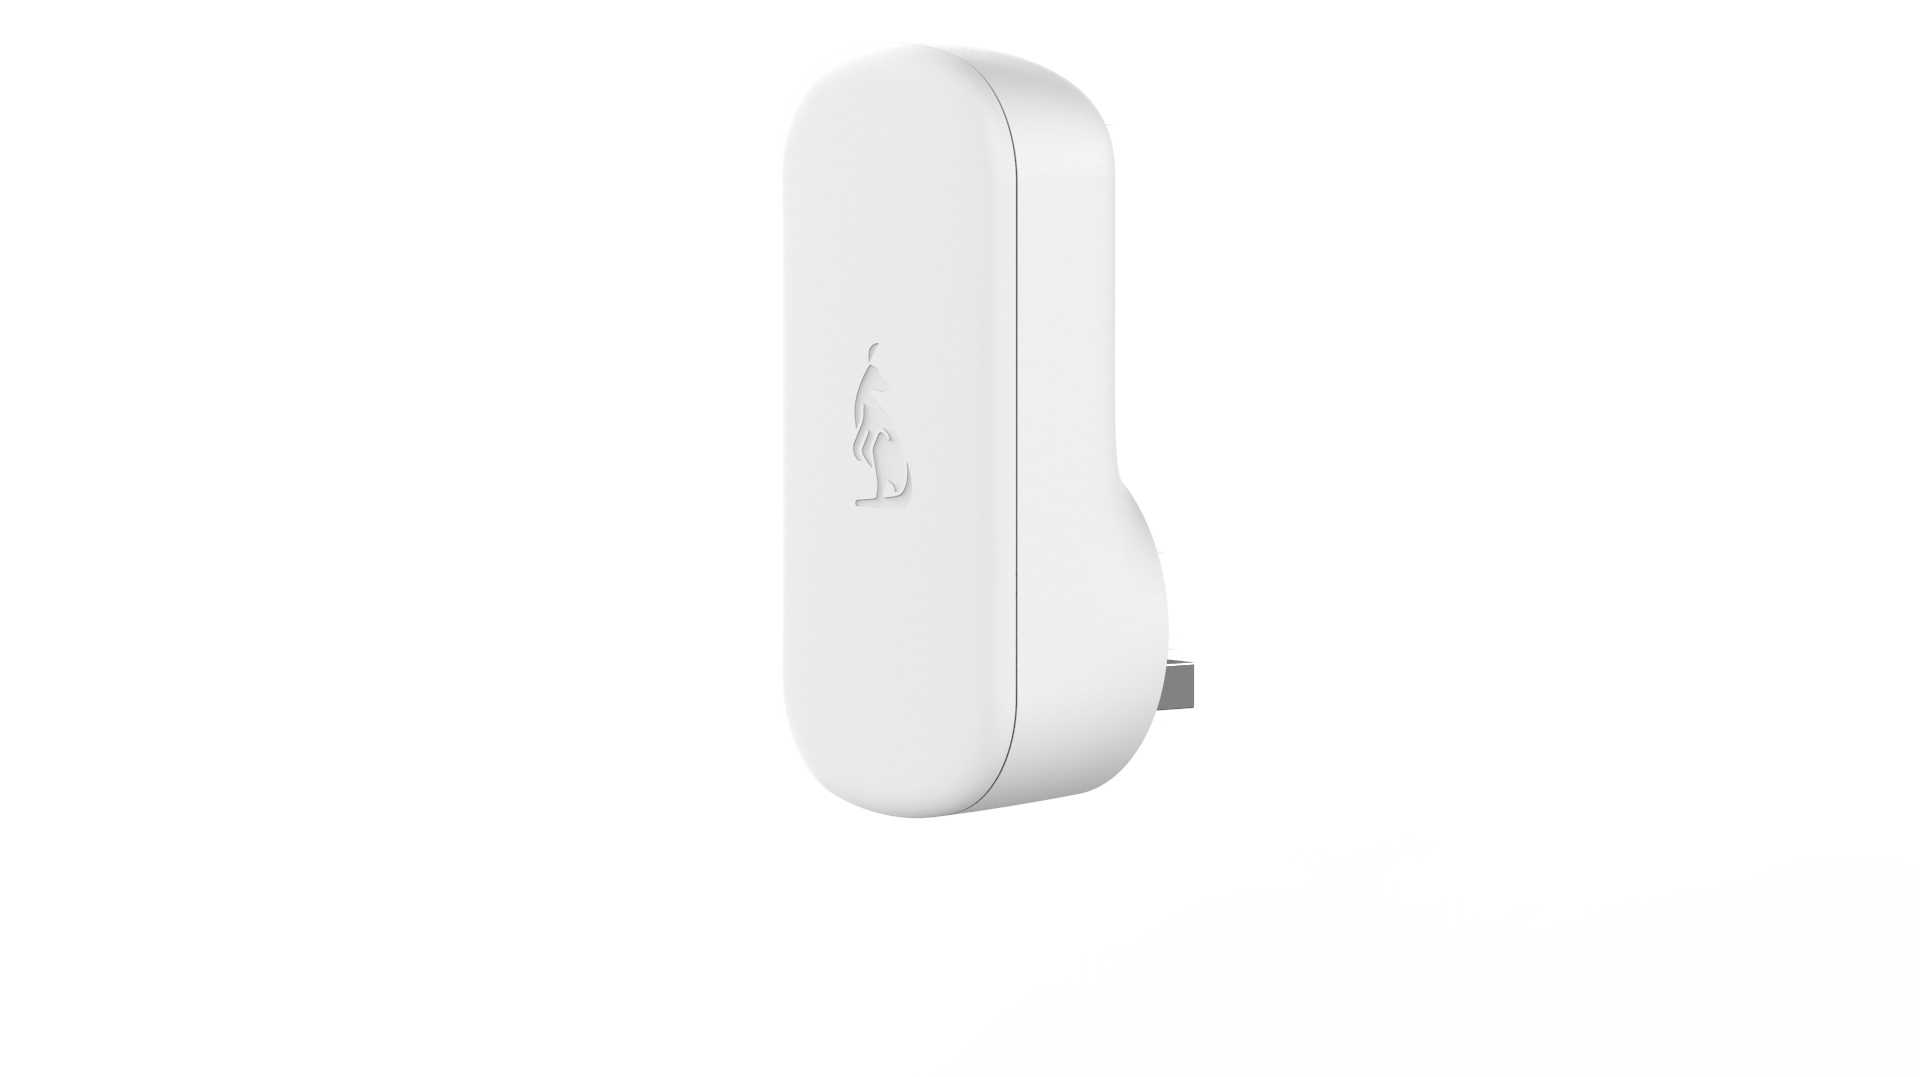
Kangaroo Video Doorbell (optional)


Understanding Doorbell Wiring
A basic doorbell system comprises a transformer, chime, and button connected by wires. The transformer converts household voltage to a safe level for the doorbell system. Identifying the wires is crucial:
Transformer wires: Usually black and white, connect to the power source.
Chime wires: Typically two or three, depending on the chime type.
Button wires: Two wires connect to the button terminals.
Troubleshooting Wire Issues:
No chime?: Double-check connections and wire integrity.
Chime hums but doesn't ring?: Faulty transformer or chime unit.
Weak chime sound?: Check wire gauge and connections.
Doorbell Component Rundown:
Transformer: Choose a transformer compatible with your doorbell and local voltage.
Chime: Mechanical chimes use solenoids, while electronic ones use digital sounds.
Button: Choose wired, wireless, or illuminated buttons according to your preference.
Kangaroo Video Doorbell: Integrates a camera, two-way talk, and motion detection for smart security.
Voltage Requirements:
Transformer output voltage should match your doorbell and chime requirements (usually 16-24V).

Cost Considerations
Materials
Doorbell Transformer: Prices vary depending on voltage requirements, brand, and features. Basic transformers start around ~$20, while smart home-compatible models with higher voltage outputs can reach ~$50.
Doorbell Chime Unit: The cost spectrum is vast, ranging from ~$20 for simple mechanical chimes to over ~$100 for wireless chimes with video and smart home features. Consider your desired functionality and aesthetics when choosing.
Doorbell Button: Styles and features influence the price. Simple wired buttons start at ~$10, while illuminated or video-enabled options can reach ~$50.
Wires: Gauge and length needed will impact the cost. Expect to spend ~$10-$20 for a basic setup.
Additional Materials: Don't forget about wire connectors, mounting hardware, and electrical tape,junction box/electrical junction box, wire nuts,wire caps, screw terminals, circuit breaker, voltage tester, multimeter adding ~$$$$ to your budget.
Professional Installation:
Hourly Rates: Electrician rates vary based on location and experience. Expect a range of ~$50-$150 per hour.
Complexity of the Job: The total cost depends on factors like wire routing, low voltage wiring existing wiring presence, wiring diagram and additional features like smart home integration. A straightforward installation might cost ~$100-$200, while complex setups could reach ~$500 or more.
Permits:
Local Regulations: Check with your local authorities to see if permits are required for electrical work. Permit fees can range from ~$20-$100 depending on your area.

Wiring Steps
Step 1: Install the Transformer
Choose a suitable location for the transformer, considering voltage requirements and distance to the chime and button.
Mount the transformer securely, following the manufacturer's instructions.
Connect the transformer wires to the power source using wire nuts, ensuring color-coding matches (usually black wire to black wire and white wire to white wire). Tighten securely with pliers.
Double-check all connections and secure any exposed wires with electrical tape.
Step 2: Connect the Chime
Mount the chime unit in your desired location.
Consult your chime's manual for specific wiring instructions, as the number and color of wires might differ.
Match the corresponding wires from the transformer and button (based on existing wiring or your manual) to the chime terminals. Ensure correct polarity (positive to positive, negative to negative).
Secure the wire connections with screws or push-in terminals according to the chime's instructions.
Step 3: Install the Doorbell Button
Choose a suitable location for the button near your door and mount it securely using screws or anchors.
Connect the doorbell wires (usually two) to the appropriate terminals on the button, again paying attention to polarity. Refer to your doorbell's manual for specific instructions.
Tighten the connection screws and secure any exposed wires with electrical tape.
Step 4: Connect the Doorbell
Consult your specific doorbell model's instructions for wiring details. Typically, there will be terminals for connecting wires from the transformer and button.
Match the corresponding wires, ensuring correct polarity, and secure the connections as per the manual's instructions.
Double-check all connections at the transformer, chime, button, and doorbell.
Step 5: Test and Troubleshoot
Turn the power back on at the breaker box.
Press the doorbell button. The chime should sound, and the doorbell should activate (light, video feed, etc., depending on its features).
If the system doesn't work, troubleshoot by checking connections, ensuring correct polarity, and verifying voltage at the transformer and doorbell. Refer to your specific doorbell's troubleshooting guide for further assistance.
Troubleshooting Wiring Issues:
Doorbell doesn't ring: Check all connections and wire integrity. Ensure the transformer is powered on.
Video doorbell issues: Refer to the Kangaroo Video Doorbell troubleshooting guide.
Finishing Touches:
Secure any exposed wires neatly and aesthetically.
Test the doorbell system again to ensure everything functions properly.
Enjoy the peace of mind and convenience of your new hardwired doorbell!
FAQs:
General Doorbell Installation:
Can I install a wired doorbell if I have no existing wiring? Yes, but it requires running new wires from the transformer location to the chime and button. Consult a qualified electrician if unsure about this process.
What if my existing wires appear damaged or outdated? Replace them with new wires appropriate for your doorbell system's voltage and amperage requirements.
Do I need specific tools for different types of doorbells? Most wired and hardwired doorbells require similar tools like screwdrivers, wire strippers, and electrical tape. Consult the specific doorbell manual for any unique tools needed.
What types of chimes are compatible with wired installations? Both mechanical and electronic chimes can work with wired systems. Ensure the chime's voltage rating matches the system's output.
Kangaroo Video Doorbell Hardwiring:
Can I hardwire the Kangaroo Video Doorbell myself? Yes, as long as you're comfortable with basic electrical work and follow the provided instructions carefully. If unsure, consult a qualified electrician.
What voltage transformer do I need for the Kangaroo Video Doorbell? The Kangaroo Video Doorbell requires a 16-24VAC transformer. Check the product manual for specific recommendations.
Does the Kangaroo Video Doorbell come with all the necessary hardware for hardwiring? It includes wire connectors and mounting screws, but you'll need a compatible transformer and additional wires if needed.
Where can I find the Kangaroo Video Doorbell hardwiring guide? It's available on the Kangaroo website or within the product packaging. Additionally, this guide provides general hardwiring principles applicable to the Kangaroo Video Doorbell.
Safety and Troubleshooting:
What safety precautions should I take when working with electrical wiring? Always turn off the power at the breaker box before starting and never touch exposed wires while the power is on.
What should I do if I encounter sparks or unusual smells during installation? Immediately turn off the power and stop working. Consult a qualified electrician to identify and fix the issue.
My doorbell rings continuously after installation. What could be wrong? This might indicate a wiring error or faulty component. Double-check your connections and refer to the troubleshooting guide for your specific doorbell model.
My Kangaroo Video Doorbell doesn't connect to Wi-Fi after hardwiring. How do I troubleshoot? Ensure the Wi-Fi network details are correct in the app and check for signal strength issues. The Kangaroo website offers detailed troubleshooting steps for various connectivity problems.
Additional Resources:
Kangaroo Video Doorbell User Manual: Video Doorbell FAQs
Kangaroo Video Doorbell Installation Video: Video Doorbell Camera - How to hardwire?
Electrical Safety Foundation International:Electrical Safety Foundation
But Wait, There's More!
For those who prefer a quick and hassle-free setup, the Kangaroo Doorbell also offers a convenient Wi-Fi option (wireless doorbell, yes!). Simply peel and stick the Kangaroo Video Doorbell to your doorframe or use the included screws for a secure mount, connect to your Wi-Fi network, and you're all set! Enjoy peace of mind with minimal effort.
By following these guidelines and utilizing the provided resources, you can confidently install your wired or hardwired doorbell system, including the Kangaroo Video Doorbell, and enjoy the benefits of enhanced security and convenience. Remember, prioritize safety and consult a professional if needed. Happy installing!